创建模块:
在 app/code/Test/Attr/etc 目录下创建 modules.xml 文件,并添加如下内容:
<?xml version="1.0"?>
<config xmlns:xsi="http://www.w3.org/2001/XMLSchema-instance" xsi:noNamespaceSchemaLocation="urn:magento:framework:Module/etc/module.xsd">
    <module name="Test_Attr" setup_version="0.0.1"/>
</config>
在 app/code/Test/Attr 目录下创建 registration.php 文件,并添加如下内容:
<?php
    \Magento\Framework\Component\ComponentRegistrar::register(
        \Magento\Framework\Component\ComponentRegistrar::MODULE,
        'Test_Attr',
        __DIR__
    );
创建产品属性和产品属性集:
在 app/code/Test/Attr/Setup 目录下创建 installData.php 文件,并添加如下内容:
<?php
namespace Test\Attr\Setup;

use Magento\Eav\Setup\EavSetup;
use Magento\Eav\Setup\EavSetupFactory;
use Magento\Catalog\Setup\CategorySetupFactory;
use Magento\Eav\Model\Entity\Attribute\SetFactory as AttributeSetFactory;
use Magento\Catalog\Model\Product;
use Magento\Framework\Setup\ModuleDataSetupInterface;
use Magento\Framework\Setup\ModuleContextInterface;

class InstallData implements \Magento\Framework\Setup\InstallDataInterface
{
    private $eavSetupFactory;

    private $attributeSetFactory;

    private $attributeSet;

    private $categorySetupFactory;

    public function __construct(
        EavSetupFactory $eavSetupFactory,
        AttributeSetFactory $attributeSetFactory,
        CategorySetupFactory $categorySetupFactory
    )
    {
        $this->eavSetupFactory = $eavSetupFactory;
        $this->attributeSetFactory = $attributeSetFactory;
        $this->categorySetupFactory = $categorySetupFactory;
    }

    public function install(ModuleDataSetupInterface $setup,ModuleContextInterface $context)
    {
        //install data here
        $setup->startSetup();

        $categorySetup = $this->categorySetupFactory->create(['setup' => $setup]);
        $attributeSet = $this->attributeSetFactory->create();

        $entityTypeId = $categorySetup->getEntityTypeId(Product::ENTITY);
        $attributeSetId = $categorySetup->getDefaultAttributeSetId($entityTypeId);

        /*创建一个属性集 MyCustomAttribute*/
        $data = [
            'attribute_set_name' => 'MyCustomAttribute',
            'entity_type_id'     => $entityTypeId,
            'sort_order'         => 200,
        ];
        $attributeSet->setData($data);
        $attributeSet->validate();
        $attributeSet->save();
        //初始化属性为Default属性集的属性
        $attributeSet->initFromSkeleton($attributeSetId);
        $attributeSet->save();

        /*创建属性 text_my_custom_attribute 并插入属性集 MyCustomAttribute 中*/
        $eavSetup = $this->eavSetupFactory->create(['setup' => $setup]);
        $eavSetup->addAttribute(
            Product::ENTITY,
            'text_my_custom_attribute',
            [
                'type' => 'varchar',
                'label' => 'My Custom Attribute Text',
                'backend' => '',
                'input' => 'text',
                'wysiwyg_enabled' => false,
                'source' => '',
                'required' => false,
                'sort_order' => 5,
                'global' => \Magento\Catalog\Model\ResourceModel\Eav\Attribute::SCOPE_STORE,
                'used_in_product_listing' => true,
                'visible_on_front' => false,
                'attribute_set' => 'MyCustomAttribute',
            ]
        );

        $setup->endSetup();
    }
}
通过上面的代码,我们创建了一个产品属性集 MyCustomAttribute 和一个产品属性 text_my_custom_attribute ,并将产品属性 text_my_custom_attribute 添加到产品属性集 MyCustomAttribute 中。
运行 CLI 命令:
在项目根目录中运行如下命令:
php bin/magento module:enable Magenticians_Mymodule
php bin/magento setup:upgrade
php bin/magento setup:di:compile
php bin/magento cache:clean
php bin/magento cache:flush
查看结果:
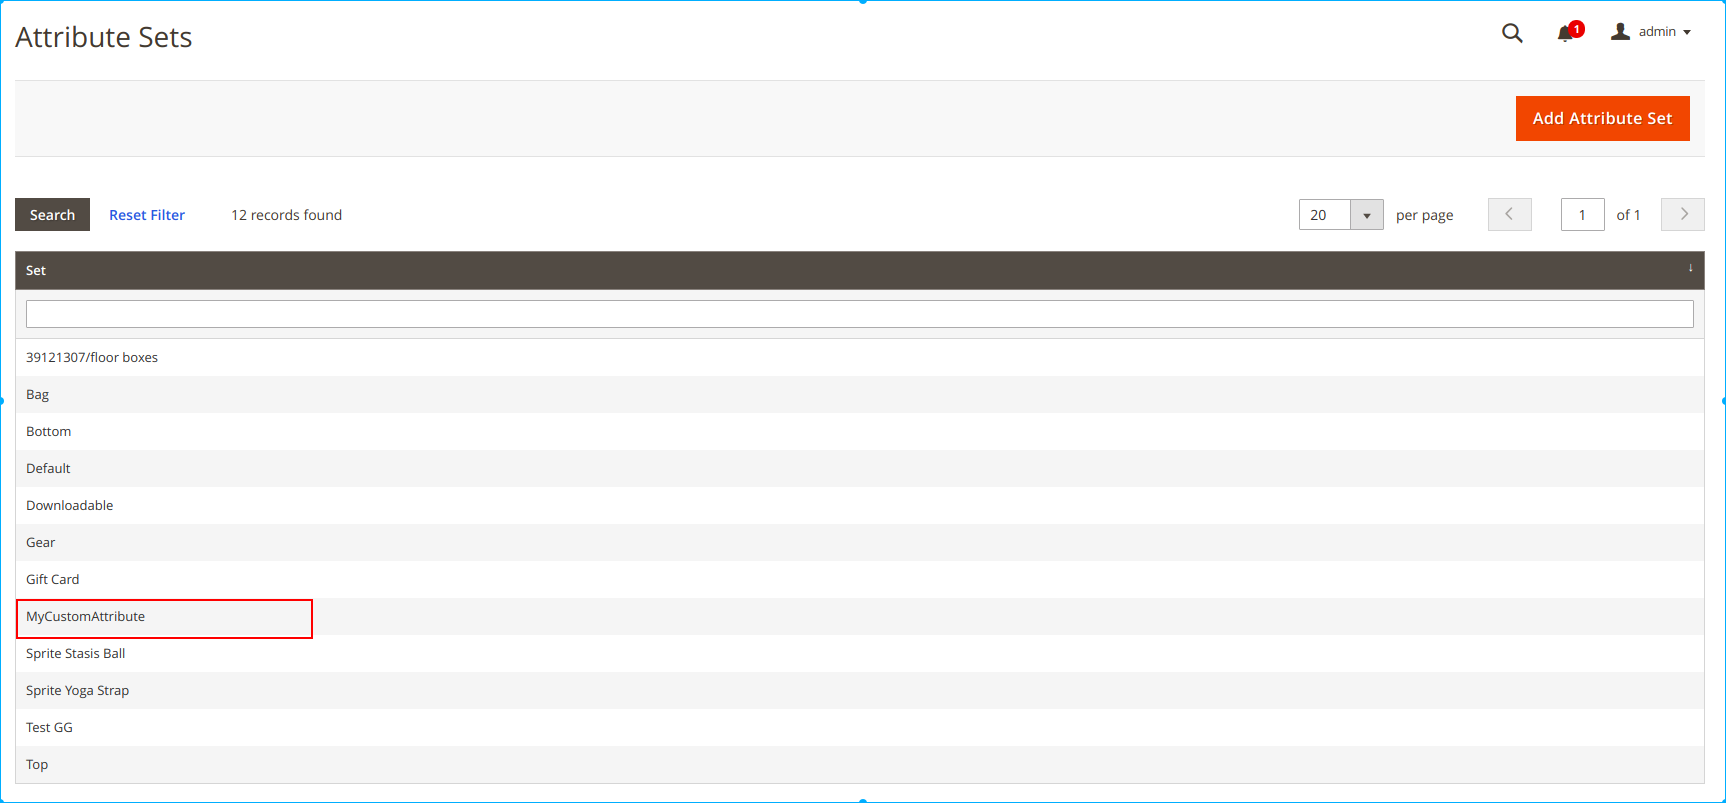
转到管理后台: Store > Attributes > Attribute Set ,可以看见创建的产品属性集 MyCustomAttribute :
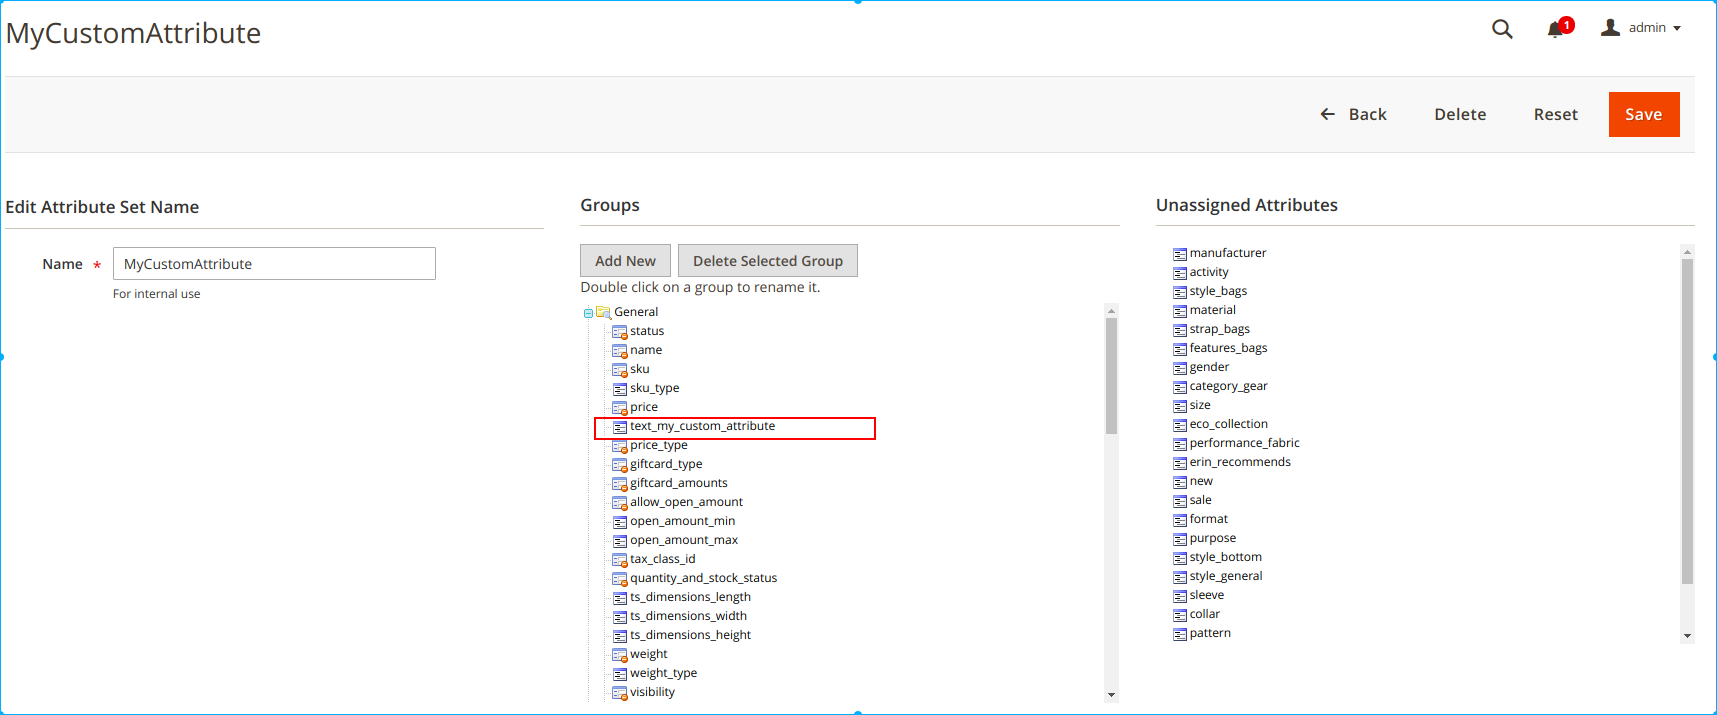
点击 MyCustomAttribute 后进入产品属性集详情页面,可以看到创建的产品属性 text_my_custom_attribute :